Expert explains the life-saving skill all dog owners should know
25 May 2022, 13:06

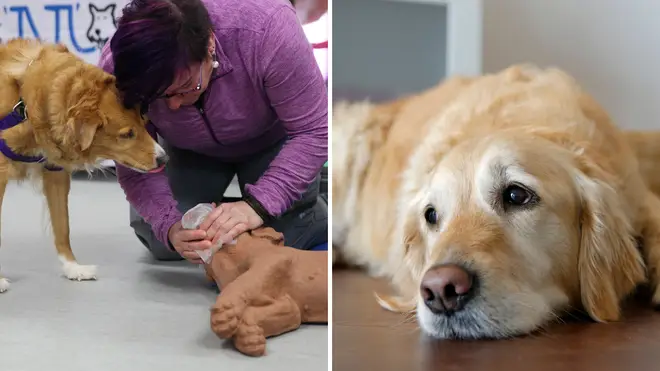
Dog owners are being encouraged to learn how to perform CPR to their pet if the worst was to happen.
Listen to this article
All dog owners understand how special having a canine companion is, and how important it is to keep them safe, happy and healthy.
There are, however, many dog owners that do not know how to perform life-saving CPR on their pet if the worst was to ever happen.
Animal Friends, a pet insurance company, and Dog First Aid Training have teamed up to encourage dog owners to learn the steps of performing CPR on a dog.
On the Animal Friends website, they explain exactly what you would need to do if you were to find your dog, or any dog, unconscious.

Jo Middleton, dog first aid trainer and founder of Dog First Aid Franchise Ltd, takes us through the steps here:
1. If you see a dog that appears to be unconscious, approach from the head and call for help.
2. Touch the dog with your foot before kneeling down to get closer
3. Look and listen for signs of life. If there are none, stroke the dog with the back of your hand.
4. Take the femoral pulse. You can find more details of how to do that here.
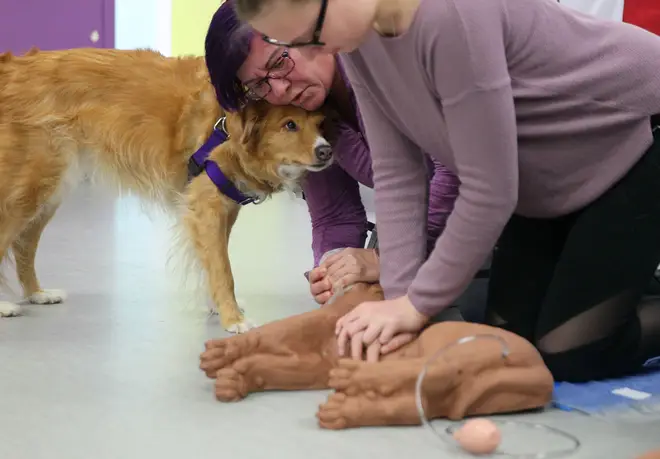
5. If there is no pulse, do two minutes of compressions, around 2000 chest compressions. Do this on the widest part of the dog's rib cage. When giving the dog compressions, go about a third of the dog's body depth down. Use the beat of Staying Alive or Nellie the Elephant to keep in time.
6. When the compressions are done, check if the pulse is back. If not, look inside the dog's mouth and clear anything that could be blocking their airway.
7. Tuck the dog's tongue inside their mouth and clamp the muzzle shut. Perform mouth-to-snout compressions. Form a seal over the dog's nose and blow air into the nose. You should be able to see the dog's chest rise with each breath to confirm the air is going into the dog's lungs.
- To help the air get through to the lungs, pull the dog's head forward to elongate the airway. Aim to have the neck and back in as straight of a line as possible.
- Perform mouth-to-snout compressions by blowing two breaths into the dog's lungs, and then taking a deep breath of fresh air. You should then perform 30 chest compressions, followed by two breaths and repeat, 30 chest compressions, two breaths and so on.
8. Do this three times and then check for signs of life or a pulse.
9. Perform this cycle until help arrives. If after 20 minutes of doing this cycle the dog is still showing no signs of life and does not have a pulse, you would decide the dog is not going to pull through.

You can read her full word-for-word explanation here:
"If you come across a dog that appears to be unconscious you need to approach it from the head area so that if it can see you, it can see you approaching. You want to call out for help so it can hear you approaching as well.
"You’re going to touch the dog with your foot before kneeling so that if the dog is going to react, you’ve got more of a chance of staying safe yourself. Once you’re down with the dog, if the dog turns on you and bites you then you haven’t got as much chance of getting up safely.
"Touch the dog with your foot and look and listen for any signs of life. If there aren’t any, come down and stroke the dog with the back of your hand. The back of the hand is much less invasive than with the front of the hand, where you’ve got the weight of the fingers and the heat of the palm. With the back, it’s a much smaller and less invasive surface area and at this point we don’t know if the dog has a pulse and/or is breathing.
"Touch with the back of your hand and you’re still looking and listening for any signs of life at all. If there aren’t any, you’re then going to take the femoral pulse as we showed in a previous video. If there is no pulse, you’re going to go into two minutes of compressions. So, that’s about 200 chest compressions. You’re going over the widest part of the dog’s rib cage. You’re going about a third of the dog’s body depth with each compression with about two compressions a second.
"If you remember that song ‘Staying Alive’ or ‘Nellie the Elephant’ these are the songs that will keep you in time. Another song which may not be quite as appropriate when performing CPR is ‘Another One Bites the Dust’.
"After you’ve done 2 minutes worth of compressions, check to see if there is a pulse back. If there is no pulse, you’re then going to look inside the dog’s mouth and then clear anything that may be in the mouth possibly obstructing the airway. You’re going to tuck the tongue into the mouth and clamp the muzzle firmly shut. With a dog, you do mouth-to-snout compressions, not mouth-to-mouth. You actually form a seal over the dog’s nose and blow air into the nose.
"So, you need to see the chest rise with each rescue breath so that you know that your air has got through to where it needs to go in your dog’s lungs. If you imagine the teabag size lungs on a Chihuahua versus the massive balloon sized lungs on a Great Dane, you need to be blowing an appropriate amount of air into those lungs to inflate them. So, on a smaller dog, it will just take a little puff of air to see that chest size, whereas on a larger breed it will take a much steadier stream of air to get into the dog’s lungs. If you see the chest rising, you know that your air has gone through.
"Something else to help the air get through is if you can pull the head forward to elongate the airway. If you aim to have a straight a topline as you can, with the neck and back as in line as possible. This is stretching out the airway meaning your air can get through to where it needs to go so that will aid with your rescue breaths.
"So, you do two breaths and between each breath you are removing your mouth and breathing fresh air into your lungs. This is so you don’t pass out, and that you’re breathing fresh air into the dog. Then you go into 30 compressions, 2 breaths, 30 compressions, 2 breaths, 30 compressions, 2 breaths.
"You do this three times and check if there is a pulse unless there is any sign of life in between. You keep repeating this cycle with 30 compressions and 2 breaths until either help arrives to help you get the dog safely down to the vet or until about 20 minutes have passed when unfortunately, you would decide that the dog was not going to pull through."
Read more pet news:
- Drivers face £5,000 fine or disqualification for letting dog hang out of car window
- Dog owners issued urgent warning as toxic caterpillars reappear in the UK
- Map reveals dog theft hotspots across England and Wales


